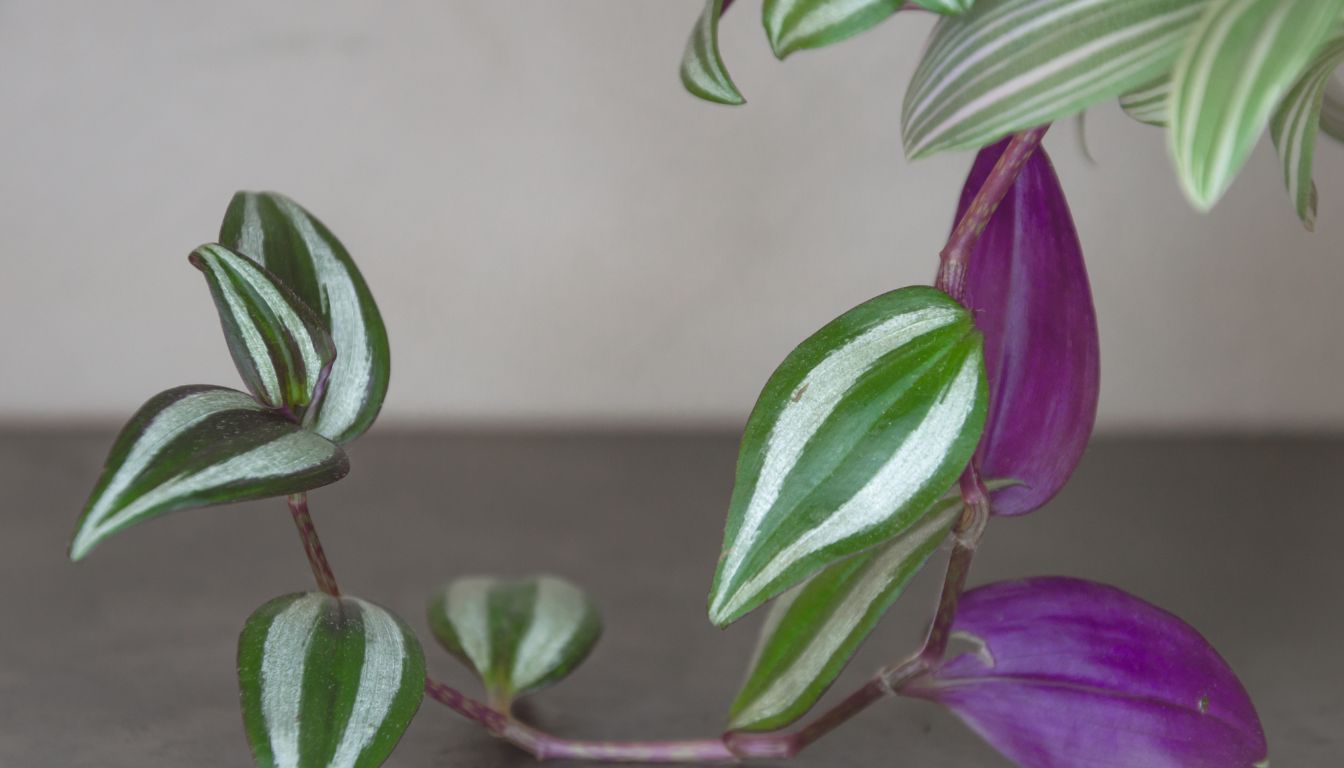
The Tradescantia, often affectionately known as the Wandering Jew or Inch Plant, is a true gem in the world of houseplants. Revered for its striking foliage, ranging from deep purples to vibrant greens, often adorned with eye-catching stripes and variegations, it adds a splash of color to any indoor space. Beyond its undeniable beauty, Tradescantia holds a special place in the hearts of plant enthusiasts for another compelling reason: its unparalleled ease of propagation. If you're looking to expand your indoor jungle, share some green gifts with friends, or simply enjoy the magic of plant reproduction, learning to propagate Tradescantia is your next rewarding adventure.
This comprehensive guide will walk you through every step of propagating Tradescantia, transforming a single plant into many vibrant additions to your collection. Whether you're a seasoned plant parent or just dipping your toes into the world of propagation, you'll discover why this resilient and forgiving plant is the perfect candidate for your next project.
Why Propagate Tradescantia? Beyond Just More Plants
Propagating Tradescantia offers a multitude of benefits, making it a favorite activity for plant lovers worldwide:
- Cost-Effective Expansion: Why buy new plants when you can grow them for free? Propagating allows you to multiply your collection without spending a fortune.
- Share the Greenery: Cuttings make wonderful, thoughtful gifts for friends and family, spreading the joy of plants.
- Maintain Plant Health: Taking cuttings can rejuvenate a leggy or overgrown Tradescantia, encouraging bushier growth and a healthier appearance.
- Experience the Joy of Growth: There's immense satisfaction in watching new roots and leaves emerge from a simple stem, a testament to nature's resilience.
Native to the Americas, Tradescantia boasts around 85 different species, many of which are fast-growing trailing plants. They are remarkably adaptable, thriving in a range of conditions, which is why they are often recommended for both novices and those who might not have the "greenest" of thumbs. Their vibrant colors and hardy nature make them a constant favorite, and their ability to quickly root means you won't be waiting long to see results.
Gathering Your Gear: Essential Tools and Preparations
Before you embark on your propagation journey, a little preparation goes a long way. Having the right tools on hand ensures a smooth and successful process. You don't need anything fancy, just a few basic items:
- Sharp Pruning Shears or Scissors: A clean cut is absolutely crucial. Blunt tools can crush the stem, damaging the plant's vascular system and hindering root development. Always use tools that have been sterilized with rubbing alcohol to prevent the spread of diseases.
- Rooting Containers: For water propagation, clear glass jars, vases, or even repurposed food containers work perfectly. For soil propagation, small pots (terracotta or plastic) with drainage holes are ideal.
- Rooting Medium: You have two primary options for rooting Tradescantia:
- Water: Clean, fresh tap water is usually sufficient.
- Potting Mix: A standard, well-draining potting mix is suitable. You can also use a seed-starting mix or a blend of peat moss and perlite for optimal aeration and moisture retention.
- Optional: Rooting Hormone: While not strictly necessary for Tradescantia (as they root easily without it), a rooting hormone can accelerate the process and increase the success rate, particularly if you're experimenting with soil propagation or want to ensure robust root development. Always follow the manufacturer's instructions carefully.
Ensuring your tools are clean and sharp sets the stage for healthy cuttings. For more detailed insights into selecting the best supplies, refer to our guide on Master Tradescantia Propagation: Essential Tools & Methods.
Selecting and Preparing Your Cuttings for Success
The key to successful propagation lies in choosing healthy, viable stems. Not all stems are created equal, so knowing what to look for will make all the difference:
Choosing the Perfect Stems
- Health and Vigor: Select stems that are robust, firm to the touch, and free from any signs of pests, diseases, or damage. Avoid stems that appear wilted, yellowed, or otherwise stressed.
- Length: Aim for cuttings that are approximately 4-6 inches (10-15 cm) long. This length provides enough energy reserves for the cutting to establish roots and gives the new plant a good head start.
- Nodes, Nodes, Nodes!: This is perhaps the most critical factor. Nodes are the small bumps or rings on the stem where leaves emerge. These are the magical points from which new roots will develop. Ensure your chosen stem has at least 2-3 nodes, ideally with a leaf or two still attached at the top.
Making the Cut and Preparing Your Cuttings
Once you've identified your ideal stems, it's time to make the cut. Remember to use your sterilized, sharp shears:
- Locate the Cut Point: Make your cut just below a node. This area is rich in meristematic cells, which are responsible for new growth. A clean, angled cut can also increase the surface area for water absorption, though a straight cut below the node is perfectly fine for Tradescantia.
- Remove Lower Leaves: Gently strip off any leaves that would be submerged in water or buried in soil. Leaves left underwater will rot, contaminating the water, while buried leaves can lead to rot in the soil. Aim to remove leaves from the bottom 1-2 inches (2.5-5 cm) of the cutting.
- Allow to Callus (Optional but Recommended for Soil): For soil propagation, some growers prefer to let the cuttings air dry for an hour or two, or even overnight, allowing the cut end to form a protective callus. This can help prevent rot, especially in humid conditions.
- Apply Rooting Hormone (If Using): If you're using rooting hormone, dip the cut end of the stem into the powder or gel, shaking off any excess.
While Tradescantia can be propagated almost any time of year indoors, early spring is often considered the perfect time, aligning with the plant's natural growth spurt. However, due to their fast-growing nature (some species grow an inch each week!), you'll find success whenever you decide to try.
Step-by-Step Methods to Propagate Tradescantia
Tradescantia offers remarkable flexibility when it comes to rooting. You can choose between water or soil, each with its own advantages.
Method 1: Water Propagation (The Easiest Route)
Water propagation is incredibly popular for Tradescantia due to its simplicity and the satisfying visual of watching roots emerge. It's an excellent method for beginners.
- Prepare Your Container: Fill your chosen clean glass jar or vase with fresh, room-temperature water.
- Insert Cuttings: Place your prepared Tradescantia cuttings into the water, ensuring that at least one node (and ideally a few) is submerged. The leaves should remain above the waterline.
- Find the Right Spot: Place the container in a location that receives bright, indirect light. Avoid direct, intense sunlight, which can overheat the water and stress the cuttings.
- Change Water Regularly: Change the water every 3-5 days to keep it fresh and oxygenated, preventing bacterial growth.
- Observe Root Growth: Within 1-3 weeks, you should start to see tiny white roots emerging from the nodes. Let the roots grow to about 1-2 inches (2.5-5 cm) long before transplanting.
- Transplant to Soil: Once the roots are sufficiently developed, gently transfer your rooted cuttings to a small pot filled with well-draining potting mix. Water thoroughly after transplanting.
Method 2: Soil Propagation (For Robust Root Systems)
Rooting directly in soil can sometimes lead to a more robust root system initially, as the plant doesn't experience the shock of transitioning from water to soil.
- Prepare Your Potting Mix: Fill a small pot with a well-draining potting mix. You can moisten the soil slightly beforehand.
- Create Planting Holes: Use a pencil or your finger to make small holes in the soil where you intend to plant your cuttings. This prevents rubbing off any rooting hormone or damaging the delicate stem.
- Insert Cuttings: Carefully insert your prepared Tradescantia cuttings into the holes, ensuring that at least one node is buried beneath the soil surface. Gently firm the soil around the base of each cutting to ensure good contact.
- Water Gently: Water the soil thoroughly but gently until water drains from the bottom. The goal is moist, not soggy, soil.
- Maintain Humidity and Light: Place the pot in a spot with bright, indirect light. To boost success, especially in drier environments, you can create a mini-greenhouse effect by covering the pot loosely with a clear plastic bag or dome. This helps maintain humidity around the cuttings.
- Check for Rooting: After a few weeks (typically 3-6 weeks), you can gently tug on a cutting. If you feel resistance, it indicates that roots have formed. New leaf growth is another clear sign of successful rooting.
- Continue Care: Once rooted, treat the cuttings as you would a mature Tradescantia plant, gradually reducing humidity if you used a cover.
Both methods are incredibly effective, making it truly effortless to Effortless Tradescantia Propagation: Grow More Plants For Free.
Nurturing Your New Tradescantia Plants
Once your Tradescantia cuttings have rooted and are establishing themselves, consistent care is key to their long-term health and vibrant growth:
- Light: Tradescantia thrives in bright, indirect light. Too little light can cause leggy growth and dull foliage, while direct, harsh sunlight can scorch the leaves.
- Watering: Water when the top inch or two of soil feels dry to the touch. Tradescantia prefers consistently moist, but not waterlogged, soil. Ensure good drainage to prevent root rot.
- Humidity: While adaptable, Tradescantia appreciates higher humidity. Misting occasionally or placing the pot on a pebble tray filled with water can be beneficial, especially in dry indoor environments.
- Fertilization: Once your new plant is actively growing (usually a month or two after rooting), you can begin feeding it with a balanced liquid houseplant fertilizer at half strength during the growing season (spring and summer).
- Pinching: To encourage a bushier plant, regularly pinch back the growing tips. This prompts the plant to produce side shoots, leading to a fuller appearance.
Conclusion
Propagating Tradescantia is not just a simple gardening task; it's a deeply rewarding experience that connects you more intimately with the plant world. With its forgiving nature, rapid growth, and stunning variety of foliage, the Wandering Jew truly lives up to its reputation as one of the easiest and most enjoyable plants to multiply. By following these straightforward steps, you can easily expand your collection, share your passion with others, and revel in the satisfaction of growing beautiful new life from a simple cutting. So, grab your shears, select your stems, and get ready to witness the magic of propagation!