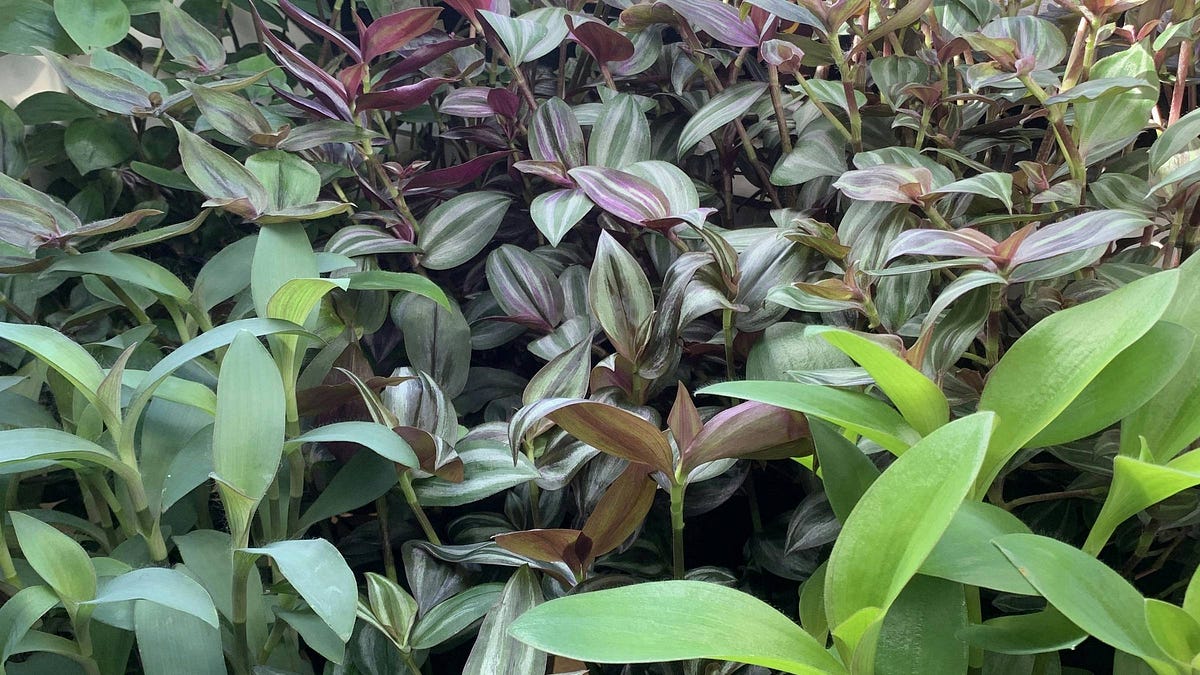
The allure of the Tradescantia, often affectionately known as the Wandering Jew or Inch Plant, lies in its striking foliage and remarkable resilience. With leaves boasting a spectrum from deep purples to vibrant greens, often adorned with captivating stripes or variegations, it's no wonder this plant is a beloved staple in many indoor gardens. Beyond its aesthetic charm, Tradescantia is celebrated for another fantastic quality: its incredible ease of propagation. If you're keen to expand your plant collection without stretching your budget, learning to Propagate Tradescantia: Easy Step-by-Step Guide for Success is an absolute game-changer. This comprehensive guide will equip you with all the essential tools, methods, and expert tips to successfully propagate Tradescantia, transforming one plant into many.
Understanding the Tradescantia Plant: A Propagator's Dream
Native to the Americas, Tradescantia encompasses a fascinating genus with over 85 different species, many of which are popular as hanging plants. What makes them so special for propagation is their inherent nature as vigorous growers, often adding an inch of growth each week and capable of reaching impressive lengths of 1-2 feet. This rapid growth, coupled with their adaptability, makes them incredibly forgiving and rewarding for both seasoned plant enthusiasts and novice propagators alike. They thrive in a range of conditions, signifying their resilience and making them an ideal candidate for your next plant project. Folklore even suggests they bring good fortune and possess healing qualities, adding another layer to their appeal.
Their stems are naturally segmented with visible "nodes" – small bumps or rings from which leaves and roots emerge. This physiological characteristic is precisely why Tradescantia is such a dream to propagate from cuttings; these nodes are essentially pre-programmed root factories, just waiting for the right conditions to spring into action. Understanding this fundamental aspect of their growth is key to successful propagation.
Essential Tools for Successful Tradescantia Propagation
Before you dive into the exciting world of plant multiplication, gathering the right tools is paramount. You don't need an elaborate setup, but having these essentials will ensure a smooth, hygienic, and successful propagation process.
Sharp, Clean Cutting Tool
- Why it's crucial: A clean, sharp cut minimizes damage to the mother plant and the cutting itself. Blunt tools can crush the stem, hindering water uptake and root development, and making the cutting more susceptible to disease.
- Options: Small, sharp pruning shears, a clean pair of household scissors, or even a craft knife.
- Expert Tip: Always sterilize your tool before and after use. A quick wipe with rubbing alcohol or a dilute bleach solution will kill any pathogens, preventing their spread between plants.
Containers for Rooting
- For Water Propagation: Any clean, clear container will work – glass jars, old bottles, or even a shot glass. Clarity allows you to monitor root growth and water levels easily.
- For Soil Propagation: Small pots (2-4 inches), seed-starting trays, or repurposed containers like yogurt cups (with drainage holes added) are perfect. Drainage holes are non-negotiable for soil propagation to prevent waterlogging and root rot.
Rooting Medium
- Water: The simplest medium. Ensure it's clean water, preferably room temperature.
- Potting Mix: A standard, well-draining indoor potting mix is generally sufficient. You can enhance drainage by adding perlite or vermiculite if your mix seems heavy. A sterile medium is always recommended to reduce the risk of fungal issues.
Optional: Rooting Hormone
- Purpose: While Tradescantia readily roots without it, rooting hormone can significantly speed up the process and improve success rates, especially if you're propagating less vigorous cuttings or want to give them an extra boost.
- Application: If using, lightly dip the cut end of the stem into the hormone powder or liquid as per package instructions before placing it in your chosen medium.
Other Useful Accessories
- Gloves: Useful for handling soil or rooting hormone.
- Labels: If propagating multiple varieties, labels will help you keep track of what's what.
- Watering Can/Spray Bottle: For gentle watering of soil cuttings.
Selecting the Perfect Cuttings: The Foundation of New Growth
The success of your Tradescantia propagation hinges significantly on the quality of the cuttings you take. Not all stems are created equal, and choosing the right ones can make all the difference.
Timing is Key
While Tradescantia can be propagated year-round indoors, the Effortless Tradescantia Propagation: Grow More Plants For Free method is often most successful during the plant's active growing season – typically early spring through late summer. During these periods, the mother plant is more robust, and the cuttings will root faster due to abundant light and warmth.
Health of the Mother Plant
Always select cuttings from a healthy, vibrant mother plant. Look for stems that are:
- Pest and Disease-Free: Inspect thoroughly for any signs of infestations or diseases, as these can easily transfer to your new cuttings.
- Firm and Turgid: Avoid wilting or flimsy stems. A healthy stem will feel firm to the touch.
- Vibrant in Color: Choose stems with good, characteristic coloration for the variety.
Ideal Stem Length and Node Count
Aim for cuttings that are approximately 4-6 inches long. This length provides enough stem to support future growth while also being manageable for rooting. Crucially, each cutting should have at least 2-3 nodes. Nodes are the small bumps on the stem where leaves emerge, and they are the magical points from which new roots will sprout. More nodes often mean a higher chance of successful propagation.
Making the Perfect Cut
- Identify the Cut Point: Choose a healthy stem section.
- Remove Lower Leaves: Gently pinch or snip off the leaves from the bottom 1-2 inches of the stem. This exposes the nodes that will be submerged in water or planted in soil, preventing leaves from rotting and allowing roots direct access to the medium.
- Make a Clean Cut: Using your sterilized, sharp tool, make a clean cut just below a node. A 45-degree angle is often recommended as it increases the surface area for water absorption and reduces the likelihood of water pooling on the cut surface, which can lead to rot.
Once you've made your selections and prepared your cuttings, they are ready for their new journey to becoming independent plants.
Step-by-Step Propagation Methods for Tradescantia
Tradescantia offers fantastic flexibility when it comes to propagation methods. The most common and easiest methods are water propagation and soil propagation from stem cuttings, with root division also being an option for mature plants.
Method 1: Water Propagation (The Visual Method)
This method is incredibly popular because it allows you to watch the roots develop, which is both fascinating and reassuring for beginners.
- Prepare Cuttings: Follow the steps above to select and prepare your 4-6 inch stem cuttings, ensuring the lower leaves are removed and nodes are exposed.
- Place in Water: Fill your chosen clear container with clean, room-temperature water. Place the cuttings into the water, ensuring that at least one or two nodes are fully submerged. Keep the leaves above the waterline.
- Location: Place the container in a spot that receives bright, indirect light. Avoid direct, harsh sunlight, which can overheat the water and stress the cuttings.
- Maintenance: Change the water every 2-3 days to prevent bacterial growth and replenish oxygen. You'll typically see tiny white roots emerging from the nodes within 1-3 weeks.
- Potting Up: Once the roots are about 1-2 inches long (usually 3-6 weeks), your cuttings are ready to be transferred to soil. This transition should be done carefully to minimize transplant shock. It's often beneficial to gradually acclimate them to lower humidity before potting.
Method 2: Soil Propagation (The Direct Method)
Propagating directly in soil can sometimes lead to less transplant shock later, as the plant grows accustomed to a soil environment from the start.
- Prepare Cuttings: As with water propagation, select and prepare your cuttings, removing lower leaves. If using rooting hormone, dip the cut end into the powder/liquid.
- Prepare Potting Mix: Fill your small pots or tray with a well-draining potting mix. Lightly moisten the soil beforehand.
- Plant Cuttings: Create a small hole in the center of the soil with your finger or a pencil. Carefully insert the cutting into the hole, ensuring that at least one or two nodes are buried beneath the soil surface. Gently firm the soil around the base of the cutting to provide support.
- Watering: Water thoroughly immediately after planting, allowing excess water to drain out.
- Environment: Place the potted cuttings in a warm location with bright, indirect light. Maintain consistent soil moisture – don't let it dry out completely, but also avoid overwatering, which can lead to rot.
- Checking for Roots: You can gently tug on a cutting after a few weeks. If you feel resistance, it means roots have begun to form and anchor the plant. This method generally takes a bit longer to show visible signs of rooting compared to water. For increased humidity and faster rooting, you can cover the pot loosely with a clear plastic bag, creating a mini-greenhouse effect.
Method 3: Root Division (For Established Plants)
This method is ideal when you have a large, bushy Tradescantia that has outgrown its pot or when you wish to rejuvenate an older plant.
- Unpot the Plant: Gently remove the entire plant from its container.
- Inspect Roots: Carefully loosen the soil around the root ball and identify natural divisions or clumps of stems with their own root systems.
- Divide: Using your hands, gently pull apart sections of the plant. If the roots are very dense, you may use a clean knife to make careful cuts through the root ball. Ensure each new section has a healthy cluster of roots and several stems.
- Repot: Plant each division into its own pot with fresh potting mix. Water thoroughly.
Care for Your New Tradescantia Cuttings
Once your Tradescantia cuttings begin to root, they'll need a bit of nurturing to grow into thriving plants.
- Light: Continue to provide bright, indirect light. Young plants are more susceptible to sunburn, so avoid direct, harsh sunlight.
- Watering: For newly potted cuttings, keep the soil consistently moist but never waterlogged. As the plant matures, allow the top inch of soil to dry out before watering again.
- Temperature & Humidity: Tradescantia prefers warm temperatures, ideally between 65-75°F (18-24°C). While not strictly necessary, moderate to high humidity can encourage more vigorous growth in young cuttings.
- Patience: Remember that propagation takes time. Some cuttings may root faster than others. Don't be discouraged if some don't make it; that's a natural part of the process.
- Fertilization: Avoid fertilizing young cuttings until they are well-established and showing significant new growth, typically a few weeks after potting up.
Mastering Tradescantia propagation is an incredibly rewarding endeavor. With the right tools and these straightforward methods, you can effortlessly expand your plant collection, share with friends, or simply enjoy the satisfaction of nurturing new life from a simple cutting. Propagating Tradescantia is truly an Effortless Tradescantia Propagation: Grow More Plants For Free way to enhance your indoor jungle.